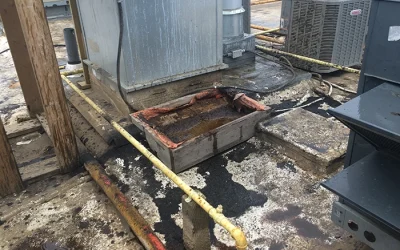
This article explains why flat roof underlayments and base sheets are the foundation of long-term roof performance, especially in cold climates. Drawing on 33 years of real-world installations across Canada, the US, and the UK, it exposes why standard felt causes membrane failures, how chemical incompatibility ruins TPO and PVC roofs, and which underlayment systems actually protect your investment when temperatures drop below −20°C.
The Misconception: Why “Roofing Felt” is the Most Misunderstood Term in Low-Slope Roofing
I’ve torn off probably 200 flat roofs where the whole system failed because someone used standard #15 asphalt felt under a membrane. Last winter in Calgary. Walked onto a 5-year-old TPO roof that looked like a relief map.
The membrane was bubbling everywhere, ghosting the felt pattern underneath. The building owner paid $45,000 for a membrane that should’ve lasted 20 years. Lasted five.
Here’s the problem. Most people hear “underlayment” and think of that black paper their roofer used on their house. That’s shingle felt. Designed for steep slopes where water runs off fast. Put it under a flat roof membrane, and you’re building in failure from day one.
The stakes get higher when you factor in cold-weather performance. I’ve seen felt crack like glass in Edmonton winters. Once that happens, your membrane’s sitting on a fractured substrate. Every freeze-thaw cycle makes it worse. By year three, you’re looking at adhesive delamination. By year five, you need a tear-off.
What we’re really talking about here is the foundation layer. Call it underlayment, base sheet, or substrate ply. Doesn’t matter what name you use. What matters is understanding that this layer determines whether your $50,000 membrane makes it to warranty or fails at year six.
The goal with this article is simple. I want you to understand the difference between temporary weather protection and structural foundation. Because once you get that, you’ll never let a contractor talk you into cheap felt under an expensive membrane.
Is “Felt” Even the Right Word? The Hierarchy of Layers

Flat roof underlayments and base sheets shown in a layered system, highlighting cold climate risks and membrane compatibility issues.
First thing to clear up is terminology. In the flat roofing world, we’ve got three different products that people lump together.
Underlayment is your temporary weather barrier. What you put down to protect the deck while you’re working. Standard asphalt felt, synthetic products, that kind of thing. Meant to shed water for maybe 30 days while you finish the job.
The base sheet is your first structural ply in a multi-layer system. This is what goes under modified bitumen, built-up roofing, any torched system. Not temporary. Bonded to the deck. Becomes part of the permanent assembly.
A separation layer is what you need when your base layer and membrane aren’t chemically compatible. Think of it like a marriage counsellor between two products that don’t get along.

The confusion happens because all three look similar. They’re all rolled goods. All black or grey. All come on pallets. But using them wrong is like using drywall screws in treated lumber. Looks fine until the weather hits.
Let me tell you about material evolution. Original roofing felt came from actual rags. Cotton, wool, whatever textile mills threw away. They pulped it, pressed it flat, and saturated it with asphalt. That’s your organic felt. Problem is, it rots. Absorbs water. Loses strength in 10-15 years, even when it’s buried in the assembly.
Then we got a fibreglass mat. Same process, but the base mat is woven glass fibres instead of cotton. Way more stable. Doesn’t rot. Handles moisture better. This is what most base sheets are made from now: Fibreglass mat with asphalt saturation.
The latest evolution is a polyester mat. Even tougher than fibreglass. Used in high-end base sheets where you need serious puncture resistance. I spec these on roofs with lots of mechanical traffic. Costs more. But you don’t get the tool damage you’d see with a standard glass mat.
Now here’s why flat roofs demand more than what works on houses. When you’ve got 2/12 pitch or steeper, water sheds fast. Your underlayment just needs to handle short-term exposure. But on flat roofs, you’ve got standing water potential. You’ve got UV exposure during installation. You’ve got thermal stress from heat buildup.
Standard #15 felt on a flat roof is a death sentence. I’ve seen it happen too many times. The felt telegraph through the membrane. You get this wavy surface. Or worse, the felt absorbs moisture from below, swells, then shrinks when it dries.
Creates voids under your membrane. Those voids turn into bubbles. Bubbles lead to delamination. Delamination leads to my phone ringing at 6 AM.
Real example from Winnipeg, about four years ago. Commercial building, 12,000 square feet. Contractor used standard felt under fully-adhered EPDM because he “always did it that way” on residential.
Two winters later, the membrane was lifting in sheets. Moisture had wicked into the felt, froze, expanded, and broke the adhesive bond. Repair cost? $38,000. All because he saved $800 on the proper base sheet.
This is why you need to think about the hierarchy. What’s touching your deck matters. What’s touching your membrane matters. And what’s between them better be compatible with both.
The Top 3 Underlayment Systems for Low-Slope Projects
Alright, let’s talk about what actually works. I’ve installed all of these systems in multiple climates. Some perform better than others depending on your setup. Here’s what I reach for and why.
Self-Adhered Peel-and-Stick Membranes: The Gold Standard

Self-adhered flat roof underlayments provide immediate waterproofing and superior cold-weather performance.
This is what I spec for 90% of residential low-slope work now. Products like Soprema Lastobond, Grace Ice & Water Shield (the commercial version, not the shingle stuff), Carlisle WIP 300HT, or equivalent self-adhered underlayments from your membrane manufacturer.
These are rubberised asphalt or butyl polymer sheets with a release film on one side. Peel off the film. Roll it down. It bonds directly to clean substrate: no torches, no hot asphalt, no adhesive buckets. Just peel and stick.
Why Self-Adhered Membranes Perform Better in Cold Weather
Why they’re the gold standard comes down to four things:
First, they’re self-sealing. Drive a nail through them, and the membrane heals around the fastener. This matters during installation when you’re walking on it, setting equipment, and drilling for mechanical attachment.
Second, they bond instantly. Soon as you press them down, they’re stuck. No waiting for adhesive to dry. No worrying about wind blowing your felt off overnight. I’ve left these exposed for three months waiting for membrane delivery. Still performed fine.
Third, they handle temperature swings better than anything else. I’ve installed these at 0°C and had them stick properly. Try that with cold process adhesive. Not happening. Always verify your specific product’s published temperature limits, but as a general rule, self-adhered membranes work in much colder conditions than liquid adhesives.
Fourth, they’re waterproof from day one. You can install your insulation and come back three weeks later for membrane. If it rains, snows, whatever, your deck stays dry. That said, check your specific product’s data sheet for maximum exposure duration. Most self-adhered membranes handle 90 to 180 days of UV exposure, but this varies by manufacturer.
The catch with self-adhered products is deck prep. They need clean substrate. Any dust, debris, or moisture, and you get adhesion failures. I make crews sweep and wipe the entire deck before we roll these out. Takes an extra hour per 5,000 square feet. Worth every minute.
Cost-wise, you’re looking at $1.20 to $2.50 per square foot installed based on recent Western Canada pricing. Confirm costs with local suppliers, as regional variation is significant. That’s 3-4 times more than felt. But I haven’t had a callback on a self-adhered job yet. Can’t say that about felt installations.
Cold climate performance is where these really shine. The rubberised asphalt stays flexible down to -40°C. No cracking, no brittleness. Compare that to organic felt, which turns into potato chips at -20°C.
One warning, though. Not all peel-and-stick products work under all membranes. Some have release agents that prevent proper bonding. Always check with your membrane manufacturer. Carlisle, GAF, and Firestone all publish compatibility charts. Read them before you buy.
Fibreglass Reinforced Felts: The BUR Workhorse
If you’re doing built-up roofing or modified bitumen, a fibreglass base sheet is probably what you’re using. This is multiple plies of asphalt-saturated fibreglass mat, typically weighing 90-140 pounds per square.
The role here is different than underlayment. This becomes the first structural ply of your roof system. You nail it down or mechanically attach it, then you torch or mop your next layer on top. Everything bonds together into a monolithic assembly.
I’ve installed probably 2 million square feet of BUR over my career. When it’s done right, it’s bulletproof. The key is getting that first base sheet down flat and tight. Any wrinkles, any loose spots, and you’re building in failure points.
Best products I’ve used are Firestone Base Plus, IKO Armour Base, or equivalent fibreglass base sheets approved by your membrane manufacturer. Both use a fibreglass mat that won’t rot. Both have enough asphalt saturation to take a torch without burning through. Both come in wide rolls (39 inches) that speed up installation.
Temperature matters with these. Cold weather kills your torch work. The asphalt doesn’t flow properly below 10°C in most products. You end up with inadequate adhesion between plies. I won’t install torch-down systems if the forecast shows anything under 5°C for the next 48 hours. Always follow the specific product’s published temperature limits, but these are typical workable thresholds I use for planning.
Fire resistance is another reason we use fibreglass base sheets. They’re rated as Class A fire barriers. This matters for code compliance on commercial buildings. Most jurisdictions won’t let you use organic felt on commercial low-slope roofs anymore.
The price point runs from $0.35 to $0.65 per square foot for the material, based on recent Western Canada pricing. Installation adds an additional $0.40 to $0.80, depending on the attachment method. So you’re at $0.75 to $1.45 total per square foot. Check with local suppliers, as these numbers vary significantly by region and market conditions.
The failure mode I see most often with base sheets is water infiltration during installation. You leave it exposed for two weeks and get rain. That water sits under your base sheet. Then you torch your cap sheet over it. Now you’ve trapped water in the assembly. Give it six months, and you’ll have blisters everywhere.
This is why I always spec a temporary cap or use the base sheet itself as your weatherproofing until you can complete the system. Don’t leave an incomplete BUR system exposed longer than 72 hours.
Synthetic Underlayments: The Slope-to-Flat Transition Zone
Synthetic underlayments are polypropylene or polyester fabrics with slip-resistant coatings. Think of products like Titanium UDL, GAF Deck-Armour, Owens Corning RhinoRoof, or similar synthetic products designed for steep-slope applications.
These have a place in roofing. But that place is NOT under flat roof membranes.
Where they work is in transition zones. You’ve got a building with a steep-slope section meeting a low-slope section. The steep side gets shingles with synthetic underlayment. The flat side gets a membrane with a proper base sheet. But that transition zone? That’s where synthetic can work.
I also use synthetic as temporary weather protection on big projects. If I’m roofing a 40,000 square foot building and I know it’ll take three weeks to finish, I’ll use synthetic as my working surface. Then I tear it off before I install the real underlayment system.
The problem with using synthetic under TPO or EPDM is slip. These products are designed to prevent workers from sliding off steep roofs. That same slip resistance creates friction under your membrane. Makes installation harder. Can cause wrinkling. And worst case, it can prevent proper adhesive contact.
Second problem is UV degradation. Most synthetic underlayments break down after 90-180 days of sun exposure. That’s fine for a house where you’re shingling next week. Not fine for a commercial flat roof where material delivery might take two months.
Third issue is temperature range. Synthetic products get brittle in cold and tacky in heat. I’ve walked on synthetic underlayment in July when it was 35°C. Stuff was so soft you could tear it with your boot. Not what you want under a 20-year membrane.
Cost runs $0.50 to $1.20 per square foot installed in most markets. So you’re not saving money compared to a proper base sheet. You’re just using the wrong product.
Bottom line on synthetic: great for steep-slope residential. Wrong choice for flat commercial. Use it in transitions or as temporary protection only.
The “Bleed-Through” Warning: Compatibility is Everything
This is where I’ve seen more roofs fail than any other single cause. Chemical incompatibility between your base layer and your membrane.
Before we go further: always check your membrane manufacturer’s approved substrate list before finalising underlayment. This single step prevents 80% of the problems I’m about to describe.
Here’s what happens. You put down standard asphalt felt. Then you install TPO membrane over it using adhesive. Six months later, you see brown stains bleeding through the white membrane. That’s plasticisers from the felt migrating into the TPO. Once that happens, the TPO gets brittle. Seams fail. Material cracks. You need a tear-off.
The chemistry here is straightforward. Asphalt-based products contain oils and solvents. Single-ply membranes like TPO and PVC are thermoplastics. When certain oils contact thermoplastics, they act like solvents. They break down the polymer chains.

I saw this firsthand in Toronto about six years ago. Big box store, 60,000 square feet of white TPO. Looked great at installation. Two years later, the whole roof had brown streaks. Testing showed the felt underneath was bleeding through. Repair estimate? $180,000. They ended up replacing the entire roof at year three.
Why Plasticiser Migration Happens
The warning signs usually show up around penetrations first. You’ll see discolouration around pipes, drains, and equipment curbs. That’s where the felt is most likely to be exposed to weather before the membrane covers it. Once water gets in, it accelerates the migration of the plasticiser.
Not all base products cause this. Fibreglass base sheets with the right asphalt formulation work fine under TPO. Self-adhered membranes with SBS-modified asphalt are compatible. The problem comes from cheap organic felt or base sheets with coal tar saturation.
Every membrane manufacturer publishes compatibility charts. Carlisle’s chart is 14 pages long. It lists every common substrate and tells you whether you can direct-apply, whether you need a separator, or whether it’s just not compatible.
The role of separator sheets is critical here. A separator (also called a slip sheet) is a thin layer between your base sheet and your membrane. Usually, it’s spunbond polyester or a thin EPDM layer. It prevents chemical migration while allowing proper adhesive contact.

Common separators include:

Roof separator layers act as cheap insurance by preventing chemical incompatibility between base materials and membranes.
– Spunbond polyester fabric (Tyvek, Typar)
– Thin EPDM fleece-back (0.45mm thickness)
– Approved slip sheets from the membrane manufacturer
These add $0.20 to $0.40 per square foot to your installation in typical markets. Cheap insurance compared to a $180,000 failure.
The solvent sensitivity factor gets worse in hot climates. Arizona, Texas, Florida, anywhere you see sustained roof temperatures above 70°C. The heat accelerates plasticiser migration. What might take five years in Edmonton happens in 18 months in Phoenix.
When I’m specifying systems now, I default to self-adhered underlayment under single-ply membranes. Removes the compatibility question entirely. Costs more upfront, but I sleep better knowing I won’t get a call in three years about brown stains.
If you’re a building owner getting quotes and the contractor’s using felt under TPO or PVC, ask one question: “Is that felt on the approved substrate list?” If they can’t show you the compatibility chart, walk away.
Why Cold Climates Change the Rules: The Alberta/Canada Perspective
Everything I’ve talked about so far gets amplified in cold climates. What works in Texas fails in Alberta. Period.
The brittleness factor is the first thing you notice. Cheap organic felt cracks when it hits -30°C. Not little hairline cracks. I’m talking full breaks across the width of the roll. Once that happens, you’ve got air pockets under your membrane. Those pockets fill with moisture. Moisture freezes. Ice expansion breaks your adhesive bond.
I remember a job in Red Deer where we used economy-grade felt as temporary protection. October. Weather looked good. Then we got a cold snap. Three days of -25°C. Came back to the site and the felt looked like a jigsaw puzzle. Pieces everywhere. Had to tear it all off and start over. Cost us $6,000 in wasted material and labour.
High-quality fibreglass base sheets stay flexible down to -40°C. Polyester-reinforced products are even better. But you’re looking at 4-5 times the cost of organic felt. Most contractors cheap out. Then they wonder why they’re back fixing failures two winters later.
Vapour management is the second critical factor. In cold climates, you’re dealing with extreme temperature gradients. Maybe -30°C outside, +20°C inside. That’s a 50-degree difference across your roof assembly.
If your underlayment acts as a vapour barrier when it shouldn’t, you trap moisture. That moisture condenses on the cold side of your insulation. Saturates it. Ruins your R-value. In extreme cases, leads to structural deck rot.
This is why understanding warm roof versus cold roof construction matters. In a warm roof, your insulation goes above the deck. Your air barrier and vapour control happen at the deck level. Your underlayment is above the thermal envelope, so it doesn’t need to breathe.
In a cold roof, your insulation is between the structure. Your roof deck is cold. Now you need your underlayment to allow moisture to escape while still protecting the deck from the weather. This is where vapour-permeable underlayments come in. But finding one that’s also durable enough for flat roof service? That’s the challenge.
I wrote a whole guide on warm versus cold roof construction that goes into this in more depth. The short version is this: in Canadian climates, warm roof construction is almost always the right choice. But if you’re stuck with a cold roof for budget or building reasons, your underlayment choice becomes critical.
Ice dam protection is the third consideration. At the roof edge, particularly on lower-slope sections, ice buildup can drive water back under your membrane system. This is why building codes in most Canadian provinces require a self-adhered membrane at eaves. Minimum 3 feet up from the edge. Some jurisdictions require it for the entire first course.
I typically run self-adhered membrane at least 6 feet in from any edge. That covers the ice dam zone, plus gives you extra protection at the most vulnerable part of the roof. Adds maybe $500 to $1,000 on a typical residential project. Prevents $5,000 in interior damage when ice backs up in February.
The snow load factor also affects base sheet selection. Heavy snow loads can compress insulation, creating deflection in your roof deck. If your base sheet isn’t flexible enough, it’ll crack at the stress points. I’ve seen this on commercial buildings in Medicine Hat after heavy snow years. The base sheet fractured along the structural beams. Once that happens, your whole system is compromised.
Before choosing any roofing system for a cold-climate building, use the Canada Snow Load Calculator to verify that your structure can withstand the regional loads. The last thing you want is to install a perfect underlayment system on a deck that wasn’t designed for Alberta snow weights.
Bottom line for cold climates: invest in quality base materials. Use self-adhered membranes where possible. If using felts, specify fibreglass or polyester reinforcement. And always account for vapour management in your assembly design.
PRO TIP: Underlayment choices don’t exist in isolation. Roof systems that intentionally retain water, such as blue roofs and blue-green hybrid roofs, place very different demands on base layers and membranes than traditional drainage-first designs. If you’re evaluating systems that involve controlled water retention, structural load, or stormwater management, read Blue Roofs vs Green Roofs to understand how system design impacts material selection, long-term performance, and risk.
Professional Installation Secrets: What Your Quote Should Say
Let me tell you what separates a $15,000 leak-free roof from a $15,000 disaster waiting to happen. It’s not the membrane. It’s how the base layers go down.
Mechanical Fastening versus Full Adhesion

Mechanical fastening and full adhesion offer very different wind resistance and waterproofing performance in flat roofing systems.
There are three ways to attach a base sheet to a deck: mechanical fasteners, full adhesion, or a combo of both.
Mechanical fastening means screws and plates. You roll out your base sheet, fasten it every 12 inches in the seams, maybe add a row of fasteners down the middle. Quick, cheap, and it works in cold weather. The downside is punctures. Every fastener is a hole in your weatherproofing. Holes can leak if the seal isn’t perfect.
Full adhesion means glueing the entire sheet down either with cold adhesive, hot asphalt, or self-adhered products. No fasteners, no penetrations. Better wind resistance, better waterproofing. The downside is cost and weather dependence. Can’t install most adhesives below 5°C.
The combo method is mechanical, fastening the base sheet, then fully adhering your membrane over it. This is what I do on most commercial projects. You get the weather tolerance of mechanical installation with the wind performance of full adhesion.
Why Wind Rating Matters More Than Installation Speed
Wind uplift is the key issue here. FM Global tests roofing assemblies for wind resistance. They assign ratings like 1-60, 1-90, 1-120. Those numbers represent wind speeds in mph. If you’re in a high-wind zone, your insurance company might require a 1-90 or higher rating.
Mechanical fastening alone usually gets you to 1-60 or 1-75. Not enough for exposed locations. Add full adhesion to your membrane layer, and you jump to 1-90 or 1-120. That’s the difference between insurance coverage and a claim denial after a windstorm.
Your quote should specify the attachment method and the FM rating; if it doesn’t, ask. And if the contractor can’t tell you the wind rating, you’re dealing with someone who doesn’t understand commercial systems.
Overlap Requirements: Why 2-Inch Side Laps Aren’t Enough
Every roll of underlayment has printed guidelines showing you where to overlap. Usually, it’s 2 inches on the sides, 6 inches on the ends. Those numbers are minimums for standard conditions.
In high-wind zones like the Alberta prairies or coastal areas, I double those requirements: four-inch side laps, 12-inch end laps. The extra material costs $200-300 on a typical residential roof. But it prevents the number one failure mode I see: wind getting under the seams and lifting the whole assembly.
I worked on a building in Medicine Hat that had lost shingles three times in five years. Every time the wind hit 100 km/h, shingles blew off. We tore everything down to the deck and found 2-inch felt overlaps. The felt was fine. But those narrow overlaps let wind pressure transfer to the shingle layer.
We replaced it with 4-inch overlaps, added more fasteners, and used high-wind-rated materials. Five years later, no failures. Same building, same location, same weather. The difference was the overlap width.
Your contractor should be increasing overlaps based on:
– Building height (taller = more wind)
– Exposure (prairie/coastal = more wind)
– Roof perimeter zones (edges see 2-3x the wind load)
– Historical weather data for your area
If your quote says “standard overlaps per manufacturer,” push back. Ask what that means in inches. Ask if they’re accounting for your specific location. Good contractors adjust for site conditions. Cheap ones follow the minimum.
The “Drip Edge” Sandwich: Preventing Edge Rot
The roof edge is where most water intrusion happens. Not in the field of the roof. At the perimeter where your membrane meets your flashing.
Proper edge detail looks like a sandwich:
1. Deck
2. Self-adhered membrane extending up the drip edge
3. Metal drip edge flashing
4. Your base sheet lapping over the drip edge
5. Your membrane lapping over everything
Most contractors skip step 2. They go straight from deck to metal. Then they wonder why they get rot at the fascia board after five years.
The self-adhered membrane at the edge creates a watertight seal. Even if your field underlayment fails, that edge detail keeps water out of the structure. I’ve seen roofs with completely failed field membranes that had zero edge damage because this detail was done right.
Metal flashing integration is critical here. Your drip edge needs to be under your base sheet but over your self-adhered edge membrane. If you get it backwards, water runs behind the flashing. If you get it right, water sheds cleanly off the building.
The cost for proper edge detailing ranges from $8 to $ 15 per linear foot, depending on building height and complexity. Pricing varies by region and labour market. A 2,000 square foot residential roof might have 180 feet of edge. That’s $1,440- $ 2,700 just for edge work.
Contractors who skip this detail save $1,500 on your installation. Then you pay $8,000 to replace rotted fascia and sheathing three years later. Not a good trade.
Your quote should itemise edge work separately. If it’s just lumped into “roof installation,” that’s a red flag. Ask specifically: “What are you doing at the roof perimeter? What products? What sequence?” If they can’t answer in detail, move on.
Conclusion: Don’t Let a $50 Roll Ruin a $10,000 Roof
I’ve done the math on this too many times. The difference between cheap felt and proper underlayment costs may be $800-1,500 on a typical residential project. The difference in performance? Five to fifteen years of service life.
Think about that. You’re spending $10,000 to $20,000 on a new flat roof. You want 20-25 years out of it. And you’re going to cheap out on $1,000 worth of base materials that literally support the entire system?
I see this constantly. Building owners who’ll argue over $500 in material upgrades, then pay $30,000 for premature replacement five years later. The expensive synthetic underlayment you don’t want to buy costs less than one day of my labour to fix a failed system.
Here’s my verdict on whether expensive synthetic underlayment is worth it: absolutely yes. But only if you’re using the right product for your application.
Self-adhered membranes under single-ply systems? Worth every penny. Prevents 90% of the compatibility issues I see.
Fibreglass base sheets under BUR or mod-bit? Essential. Nothing else performs as well.
Synthetic slip-resistant products under flat membranes? Not worth it. Use them on steep slopes or as temp protection only.
The summary here is simple: match your underlayment to your membrane system, not to your budget. A TPO roof needs different base preparation than EPDM. EPDM needs a different treatment than modified bitumen. One size does not fit all.
If your contractor is proposing standard felt under any modern membrane system, ask why. Then ask for the manufacturer’s compatibility chart. If they can’t produce it, find someone who can.
And remember this: the underlayment is the foundation. You can’t build a reliable roof on an inadequate foundation. Doesn’t matter how good your membrane is if it’s sitting on garbage.
Ready to Choose Your System?
Before you make any decisions about underlayment, you need to know which membrane system makes sense for your building. Check out the Flat Roof System Finder to compare TPO, EPDM, PVC, and modified bitumen options. The tool walks you through climate considerations, budget factors, and performance requirements to narrow down your choices.
Once you know your membrane type, you can spec the right base materials. And if you’re not sure if your contractor is using compatible products, drop a question in the comments. I’ll review your quote and tell you if anything looks wrong. Better to catch it now than after the roof’s on.
For cold climate projects, verify your structure can handle snow loads using the Canada Snow Load Calculator before you start any roofing work. Foundation problems are expensive. Snow load failures are catastrophic.
And if you’re ready to move forward with installation, use the Contractor Directory to find certified installers in your area who understand these underlayment requirements. Not all roofing contractors know the difference between steep-slope and flat-roof base preparation. Get someone who specialises in low-slope work.
Frequently Asked Questions
Can I use regular roofing felt under a flat roof membrane?
No. Standard #15 or #30 asphalt felt is designed for steep-slope residential roofing. It lacks the dimensional stability, moisture resistance, and durability required under flat roof membranes. I’ve seen failures within 2-5 years when standard felt is used under TPO, EPDM, or PVC.
The felt telegraphs through the membrane, absorbs moisture, and can cause chemical incompatibility that voids your warranty. For flat roofs, you need either self-adhered membranes, approved fibreglass base sheets, or manufacturer-specified underlayment systems.
What’s the difference between underlayment and base sheet?
Underlayment is temporary weather protection during construction. It’s meant to keep the deck dry for 30-90 days while you complete your roofing work. The base sheet is the first structural ply in a permanent roofing assembly. It’s mechanically fastened or fully adhered to the deck and becomes part of the finished roof system.
Base sheets are heavier, more durable, and designed to support the layers above them. The distinction matters because using temporary underlayment products as permanent base sheets leads to premature failure. Most quality base sheets weigh 90-140 pounds per square compared to 15-30 pounds for standard underlayment.
How do I know if my underlayment is compatible with my membrane?
Check the membrane manufacturer’s approved substrate list. Every major manufacturer (GAF, Carlisle, Firestone, IKO) publishes compatibility charts listing approved base materials. These charts tell you whether you can direct-apply, whether you need a separator sheet, or whether the combination isn’t approved.
If your contractor can’t show you this compatibility documentation, that’s a red flag. Chemical incompatibility between base materials and membranes causes brown staining, plasticiser migration, and premature membrane failure. This is especially critical with TPO and PVC systems, where certain asphalt-based felts can damage the membrane chemistry.
Do I need a vapour barrier under my flat roof?
It depends on your climate and whether you’re building a warm roof or a cold roof assembly. In most Canadian applications, warm roof construction is preferred. Your insulation goes above the deck, and your air barrier at the ceiling level controls vapour movement. Your underlayment doesn’t need to act as a vapour barrier. In cold roof construction, where insulation is between the structure and the vapour control layer, vapour control becomes more complex.
You need to prevent interior moisture from reaching the cold deck while allowing any moisture in the assembly to dry outward. This is where vapour-permeable underlayments or properly specified vapour retarders come into play. The wrong choice leads to condensation, saturated insulation, and structural damage. I always recommend consulting the article on vapour barriers versus retarders before making final decisions on cold roof assemblies.
Can I install flat roof underlayment in winter?
Self-adhered membranes can be installed in temperatures as low as 0°C if the deck is dry and clean. Some products work down to -10°C with proper surface prep. Always confirm temperature limits in the product’s technical data sheet. Torch-applied base sheets typically need temperatures above 5°C for proper adhesive flow and bonding. Cold-applied adhesive systems usually require 10°C minimum.
The bigger issue in winter isn’t air temperature but deck temperature and moisture. A frozen deck won’t bond properly even if the air is warm. Snow, ice, or frost on the substrate causes guaranteed adhesion failures. I won’t install any underlayment system if there’s visible moisture on the deck. For cold weather installation requirements specific to different roofing systems, check the cold climate roofing systems guide.
What causes bubbling under flat roof membranes?
Moisture trapped in the underlayment or base sheet is the primary cause. This happens when contractors install a membrane over damp base materials or when water infiltrates incomplete systems during construction. The trapped moisture vaporises when the roof heats up, creating pressure that lifts the membrane away from the substrate. Poor adhesive coverage is the second common cause.
If your contractor skips areas or uses inadequate adhesive, those spots will bubble when thermal stress hits the assembly. Chemical incompatibility between base materials and membranes can also cause bubbling as plasticisers migrate and break down adhesive bonds. Prevention requires dry substrate, full adhesive coverage, compatible materials, and proper installation sequencing. Once bubbling starts, it typically requires patching or a complete tear-off, depending on severity.
How long can the underlayment be exposed before I need to cover it?
Self-adhered membranes can typically stay exposed for 90-180 days, depending on the specific product and manufacturer. Check the technical data sheet for your exact product’s UV exposure limits. Standard asphalt felt breaks down after 30-60 days of direct sun exposure. Synthetic underlayments vary widely from 30 days to 6 months, depending on the product formulation.
The issue isn’t just UV degradation. Weather exposure allows water infiltration, which can saturate base materials. Repeated freeze-thaw cycles in cold climates damage even high-quality underlayments. For commercial projects, I won’t leave any underlayment exposed for more than 30 days. If membrane delivery is delayed, I install temporary protection over the underlayment to prevent weather damage. The extra cost of temporary covering is minimal compared to tearing off and replacing weather-damaged base materials.
Should I use organic or fibreglass felt under modified bitumen?
Always use fibreglass. Organic felt rots, absorbs water, loses dimensional stability, and performs poorly in cold climates. Fibreglass base sheet maintains strength, resists moisture, and stays stable across temperature extremes. The cost difference is minimal ($0.10-0.20 per square foot), but the performance difference is massive.
Organic felt might save you $300 on a residential project, but it reduces your system’s life by 5-10 years. Most building codes now prohibit organic felt on commercial flat roofs due to fire ratings. Fibreglass base sheets achieve Class A fire ratings, whereas organic felt does not. For modified bitumen systems, fibreglass base sheet is the industry standard for good reason. Don’t let a contractor talk you into organic felt just because it’s cheaper.
 About Peter Coscolin