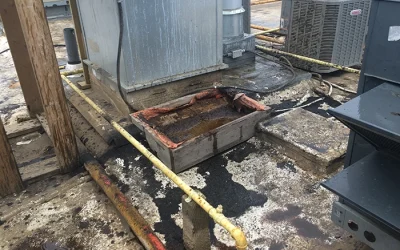
In my three decades working with flat roofs, I’ve seen one upgrade consistently transform problematic roofs into high-performing assets: tapered insulation systems.
It’s not the flashiest roofing component, you’ll never see it once the membrane goes down, but it might be the most important decision you make when designing or renovating a flat roof.

Here’s why this often-overlooked system deserves your attention and how it solves the most persistent flat roofing headaches I’ve encountered throughout my career.
The Problem with “Flat” Roofs
Let’s start with a fundamental truth: a truly flat roof is a failed roof waiting to happen.
I’ve climbed onto countless commercial buildings where water sits in large pools days after rainfall. These stagnant puddles, what we call “ponding water” in the industry, are flat roof killers. They accelerate membrane aging, create freeze-thaw damage in winter, add excessive weight, and eventually find their way inside.
The irony? Most of these problems could have been prevented with proper slope. That’s where tapered insulation comes in.
“Pro Tip: Most flat roof damage starts at the seams. If your membrane’s getting older, inspect welded seams before anything else.”
👉 TPO Roofing Guide
What Exactly Is Tapered Insulation?
Unlike standard flat insulation boards that maintain the same thickness throughout, tapered insulation gradually increases in thickness across the roof surface. This creates the necessary slope to direct water toward drains, scuppers, or gutters, all without structural modifications to the building.
Think of it as a precision-engineered watershed system that sits directly beneath your roofing membrane. The boards are arranged according to a carefully designed layout that considers drain locations, roof penetrations, equipment curbs, and other factors unique to your building.
What Tapered Insulation Looks Like During Installation
Here’s a behind-the-scenes look at how tapered insulation is installed in the field. In this photo, we’re placing EPS tapered boards over a vapour barrier on a commercial metal deck.

EPS tapered insulation is being installed over a vapour barrier on a commercial metal deck, showing slope buildup in progress.
You can clearly see how the insulation panels vary in thickness, forming a gradual slope to direct water toward the drainage points. This stage is critical for performance, and it’s why proper material layout and sequencing matter.
Why Slope Matters More Than You Think
Building codes typically require a minimum slope of 1/4″ per foot (approximately 2%) for flat roofs. This isn’t just an arbitrary number – it represents the minimum pitch needed to overcome surface tension and membrane irregularities to achieve consistent drainage.
In my experience inspecting failed roofs, inadequate slope is the common denominator behind the most expensive problems:
- Membrane degradation from UV exposure is dramatically accelerated where water ponds
- Freeze-thaw cycles in ponding areas create stress that tears membranes at seams
- Biological growth (algae, mould) flourishes in consistently damp areas
- Added weight from ponding (1″ of water = 5.2 lbs/sq.ft) can exceed structural design limits
- Water inevitably finds the weakest point in the membrane system

Most building codes now mandate “positive drainage,” requiring water removal within 48 hours after rainfall. Without a proper slope, this requirement simply cannot be met.
The Material Question: What’s Under Your Membrane
When it comes to tapered insulation, not all materials are created equal. Having installed virtually every system available, I can tell you the key differences:
Polyisocyanurate (Polyiso)
This is my go-to recommendation for most commercial and residential applications. Here’s why:
- Superior thermal efficiency (R-value of 5.5-6.5 per inch)
- Excellent fire resistance (passes most stringent fire tests without additional protection)
- Compatible with virtually all membrane systems
- Available in precise taper configurations
- Relatively lightweight compared to alternatives
Expanded Polystyrene (EPS)
While less expensive initially, EPS comes with important limitations:
- Lower R-value (3.6-4.2 per inch) requires thicker installations
- Poor fire performance unless combined with fire-rated coverboards
- Lower compressive strength (can compress under foot traffic)
- Incompatible with some solvent-based adhesives
- Lower dimensional stability in extreme temperatures
Extruded Polystyrene (XPS)
This specialty material serves specific purposes:
- High compressive strength for traffic-bearing applications
- Good moisture resistance in extreme environments
- More consistent R-value in cold conditions
- However, higher costs and environmental concerns limit the widespread adoption
“Pro Tip: When your flat roof fails repeatedly, don’t blame the weather. Look at installation quality, system choice, and drainage.”
👉 Why Flat Roofs Fail
The Economics of Tapered Systems
Let’s address the elephant in the room: yes, tapered insulation costs more initially than flat insulation. But having overseen thousands of roofing projects, I can assure you it’s one of the best investments in your building’s future.
Here’s what you can expect to pay across different regions:
| Region | Flat ISO Boards | Tapered ISO System |
|---|---|---|
| 🇺🇸 USA | $1.50 – $2.50/sq.ft | $3.50 – $6.00/sq.ft |
| 🇨🇦 Canada | CAD $2.00 – $3.00/sq.ft | CAD $5.00 – $8.00/sq.ft |
| 🇬🇧 UK | £15 – £25/m² | £35 – £50/m² |
These figures reflect installed costs, including membrane. The price variation comes from factors like:
- Complexity of the drainage pattern
- Average thickness required
- Number of drains and crickets
- Membrane compatibility requirements
- Regional labour and material costs
What these numbers don’t show is the long-term ROI. A properly sloped roof typically:
- Lasts 5-10 years longer than a poorly draining flat roof
- Qualifies for manufacturer warranty extensions (often 5+ additional years)
- Reduces energy costs through consistent insulation performance
- Minimizes maintenance and repair expenditures
- Prevents costly interior damage from leaks
Costly Mistakes I’ve Seen (And How You Can Avoid Them)
After inspecting hundreds of failed tapered systems, I’ve identified patterns of avoidable mistakes:
1. Inadequate Slope Design
The most common error is simply not creating enough slope. While 1/4″ per foot is the minimum code requirement, I often recommend 3/8″ per foot for small roofs (under 10,000 sq.ft) to overcome inevitable construction tolerances and membrane imperfections.
Solution: Work with a designer who provides detailed shop drawings showing flow arrows, thickness transitions, and drain details. Ask specifically about the minimum slope at the furthest point from drainage.
2. Incorrect Drain Placement
Even a perfect slope fails if water has nowhere to go. I’ve seen beautifully designed tapered systems rendered useless because drains were positioned at high points or too far from low areas.
Solution: Always start with a comprehensive drainage plan before designing the taper system. On retrofits, verify existing drain locations and heights before finalizing the design.
3. Material Compatibility Issues
Not all insulations work with all adhesives or membranes. EPS, for example, will dissolve on contact with solvent-based adhesives used in some single-ply systems.
Solution: Ensure your contractor provides written confirmation of system compatibility from both the insulation and membrane manufacturers.
4. Inadequate Coverboards
Tapered insulation needs protection. Skipping the coverboard leads to membrane punctures, insulation crushing, and reduced system lifespan.
Solution: Include a minimum 1/2″ high-density coverboard over the tapered system before membrane installation.
5. Ignoring Building Movement
Buildings flex, settle, and move with temperature. Rigid tapered systems that don’t accommodate this movement eventually crack and separate.
Solution: Incorporate expansion joints where needed and use proper fastening patterns designed for your specific building’s movement characteristics.
Pro Tip: Don’t just chase the highest R-value; chase balance. The smartest roofs combine just enough insulation with the right slope to prevent ponding, control condensation, and avoid unnecessary costs.
👉 Tapered vs Flat Insulation: The Real Cost Analysis You Need to See
The Tapered Solution in Action: Real-World Results

Tapered insulation retrofit in progress on a large commercial roof to resolve widespread ponding and improve long-term drainage.
Let me share a project that demonstrates why I’m such an advocate for tapered insulation:
A 60,000 sq.ft warehouse in Edmonton had suffered recurring leaks and massive heating bills for years. After removing the existing built-up roof, we discovered the original contractor had installed everything flat, despite a large central area that collected water up to 4″ deep.
We installed a custom tapered polyiso system with:
- Main field slope of 1/4″ per foot
- Enhanced 1/2″ slope in previously problematic areas
- Crickets between drains to prevent water valleys
- Sumps at each drain to accelerate the flow
- High-density coverboard throughout
The results were transformative:
- Complete elimination of ponding water
- R-value increased from R-8 to R-25 average
- Heating costs were reduced by 22% in the first winter
- Zero leaks after five Canadian winters
- Full 25-year manufacturer warranty (previously unattainable)
The system paid for itself in just over 6 years through energy savings alone, not counting the eliminated repair costs and extended roof lifespan.
Ready to move forward with professional installation? Start by understanding your project scope with our Flat Roof Cost Calculator. Get detailed estimates for materials, labour, and timeline so you can request accurate quotes and compare contractor proposals effectively
Is Tapered Insulation Right for Your Project?
While I believe most flat roofs benefit from tapered insulation, there are situations where alternatives make sense:
When to Definitely Use Tapered Insulation:
- Existing roofs with ponding water issues
- Large roof areas (over 5,000 sq.ft)
- Roofs with limited or poorly placed drains
- Buildings in regions with heavy rain or snow
- Retrofit projects where structural modifications aren’t feasible
When Other Solutions Might Work:
- New construction where structural slope can be designed in
- Very small roof areas with excellent existing drainage
- Temporary structures with limited expected lifespan
- Applications where insulation value isn’t required
Beyond the Basics: Advanced Tapered Design
For those planning a tapered system, here are some professional insights I’ve gained over decades of installations:
Cricket Considerations
Crickets, those triangular elevated areas that direct water around obstacles, are critical components of effective drainage design. They should be:
- At least twice the slope of the main roof (minimum 1/2″ per foot)
- Extended far enough to prevent water damming
- Designed with consideration for traffic patterns and equipment access
Here’s a real-world example of a tapered insulation layout from one of our past projects. This plan features a multi-drain system with slope packages and crickets to ensure water flows properly to all designated outlets.

Tapered insulation slope plan showing cricket layouts and drain flow paths for a complex commercial flat roof.
Each labelled zone represents a different insulation thickness, and the green directional lines show the flow of water. This kind of design precision is critical for complex commercial roofs, and it’s exactly why generic flat insulation just doesn’t cut it.
Sump Designs
Properly designed sumps (depressions around drains) accelerate drainage in the most critical areas. For optimal performance:
- Create gradual transitions to prevent membrane stress
- Extend sumps at least 24″ from the drain center
- Consider enhanced membrane reinforcement in these high-flow areas
Perimeter Considerations
Edge conditions require special attention:
- Maintain a minimum 8″ flashing height above the finished roof surface
- Account for insulation thickness at parapets and walls
- Consider tapered edge strips where insulation meets perimeters
“Pro Tip: Affordable doesn’t mean cheap, it means the right system for your building’s size, climate, and foot traffic.”
👉 Affordable Flat Roofing Materials
Maintaining Your Tapered System
Once installed, tapered insulation needs minimal maintenance, but there are key practices to protect your investment:
- Semi-annual drain inspection and cleaning (spring and fall)
- After-storm checks for debris accumulation in crickets and valleys
- Prompt repair of membrane damage to prevent water migration beneath the system
- Infrared scanning every 5 years to detect any trapped moisture
Frequently Asked Questions On Tapered Insulation
Can tapered insulation be installed over my existing roof?
In many cases, yes – provided the existing roof is dry and structurally sound. This “recover” approach saves tear-off costs and minimizes disruption. However, building codes typically limit you to two roof systems, so if you already have two in place, complete removal will be required.
How thick will the insulation be at the highest point?
This depends entirely on your roof size and drain locations. On large commercial roofs, I’ve designed systems reaching 12″ or more at high points. For average residential or small commercial applications, maximum thickness typically ranges from 4-8″.
Will this affect my rooftop equipment or penetrations?
Yes – and this requires careful planning. Equipment curbs, pipe penetrations, and roof accessories may need height modifications. An experienced contractor will provide detailed elevations showing these adjustments before work begins.
Can I use tapered insulation with any roofing membrane?
Yes, tapered systems are compatible with all major membrane types, including EPDM, TPO, PVC, modified bitumen, and built-up roofing. The key is ensuring the insulation material is compatible with the specific adhesives or attachment methods used with your chosen membrane.
Does tapered insulation meet current energy codes?
When properly designed, yes. Most energy codes specify minimum R-values, not insulation thickness. Tapered systems are calculated using the average thickness to determine compliance. In colder climates requiring high R-values, we often start with a flat insulation layer beneath the tapered system to achieve both drainage and thermal requirements.
Final Thoughts: The Long View on Flat Roofing
Throughout my career, I’ve seen roofing technology evolve dramatically, but one principle remains constant: water management is the foundation of every successful roofing system. Tapered insulation represents the most effective way to manage water while enhancing thermal performance.
Remember: the lowest bid rarely delivers the lowest lifecycle cost. Investing in proper slope from the beginning will pay dividends for decades, likely outlasting the membrane itself when the time comes for replacement.
If you’re planning a flat roof project or facing problems with an existing one, I’m always available to answer your questions through my Flat Roof Advisor app: https://flatroofinginsights.com/flat-roof-advisor-access/.
This free resource draws on my three decades of flat roofing experience to provide instant answers to your specific questions, because every roof deserves the proper foundation for success.
Want more insights from the field? Don’t miss these next reads:
- Learn about installation techniques: Flat Roof Installation: A Step-by-Step Guide
- Compare Materials: TPO vs. EPDM Roofing – Which Is Better?
- Understanding Material Pricing: TPO vs. EPDM Roofing – Which Is Better?
 About Peter Coscolin